


1. Overview
- CV Classified is a SharePoint-based classifieds and internal marketplace solution that helps organizations enable employees to post, browse, and manage classified listings — items for sale, services, requests, recommendations, and community announcements — through a centralized, moderated experience built natively on Microsoft 365.
- This guide walks through the installation tracks required for a complete deployment:
- SharePoint App Deployment — adding the CV Classified web part to your tenant and target site.
- Web Part Configuration — placing and configuring the CV Classified experience on a SharePoint page.
- Marketplace Subscription — activating a paid plan so the solution runs without restrictions
2. Prerequisites
- Before starting the deployment, confirm the following are in place:
- SharePoint environment: Microsoft 365 tenant with SharePoint Online and App Catalog enabled.
- App Catalog site: A tenant-level or site-collection App Catalog must be created and accessible.
- Admin access: Global Administrator or SharePoint Administrator rights are required for tenant-level deployment and for approving API permissions.
- Target site: A modern SharePoint site (communication or team site) designated to host the classifieds and marketplace experience.
- Billing account: A valid payment method on the Microsoft account used to activate the Marketplace subscription.
3. Part 1 — Deploy the CV Classified SharePoint App
- Follow these steps in order. Each step assumes the previous step completed successfully.
Step 1: Deploy the Solution (Admin)
- Go to Microsoft Marketplace
- Search CV Classified under SharePoint Products or open the link below for direct access.
- https://marketplace.microsoft.com/en-us/product/WA200005834?tab=Overview
- Click on Get it now
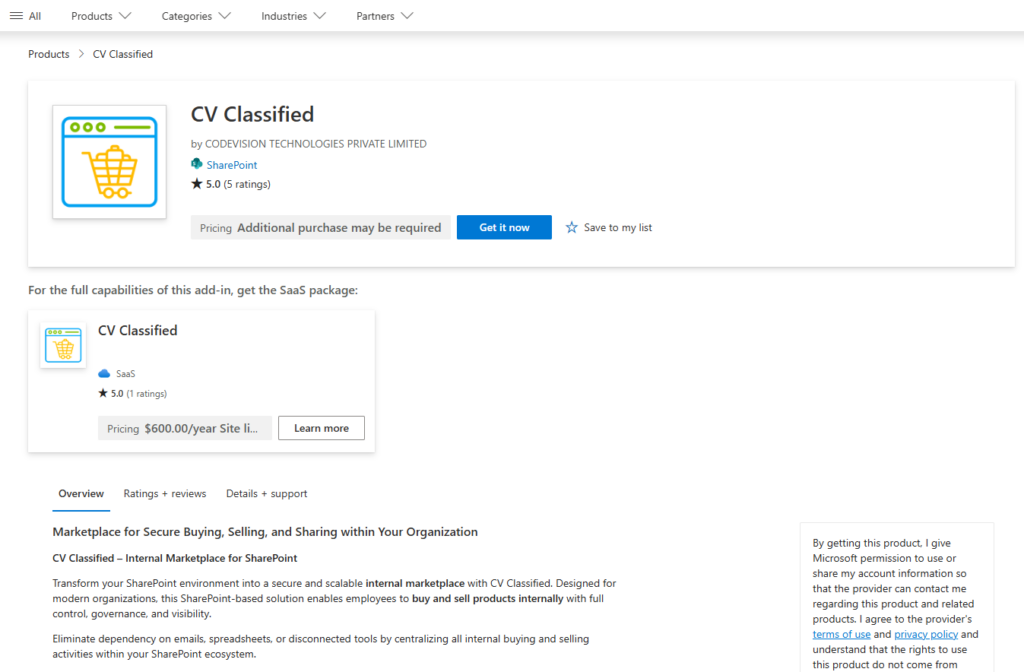
- Confirm your details to continue to click get it now
- Wait for process & it will take to SharePoint store
- Click on “Add to Apps site” button under SharePoint store
- One prompt will open for “Confirm data access“
- Click Only enable this app under App availability & click Add button
Step 2: Grant API Access
- Once done another prompt box will open for “Approve access so this app works as designed“
- Go to API access page it will redirect to SharePoint admin center for grant API access
- Select API request under pending requests & click approve button from top menu button
- Verify details & click approve button
- Once approve go to previous tab where we have added app.
- You can check message “This app has already been added to the Apps site.” under Add button as well as “The app has been added.” success message at top header.
- Click on manage apps page from message section. It will redirect to Tenant level app catalog where you can see added app under Apps for SharePoint section.
Step 3: Add the App to a SharePoint Site
- Note: Skip this step if you selected “Enable this app and add it to all sites” in the previous step.
- Navigate to the target SharePoint site collection.
- Open Site Contents from the site settings menu.
- Click + New → App in the top ribbon.
- Under Apps You Can Add, select CV Classified and click Add.
- After the app is successfully added, it will be displayed in the side content.
4. Part 2 — Configure the CV Classified Web Part
- Once the app is installed, add the web part to a SharePoint page so employees and administrators can post, browse, and moderate classified listings from a single experience.
Step 1: Create the Classifieds Page
- From the target site, go to Site Contents → New → Page.
- Select a blank page template and give it a clear title such as “Classifieds”, “Employee Marketplace”, or “Community Board”.
- Add a full-width section (recommended) so the listing grid, category filters, and post form render with adequate horizontal space.
- Optionally pin this page to the site’s top navigation so users can access classifieds directly from the site header.
Step 2: Add the Web Part
- Click the + icon inside the section to open the web-part picker.
- Search for “CV Classified” and select the result. Wait a few seconds for the web part to initialize.
Step 3: Add Configuration Setup from settings
- Click settings tab from navigation menu.
- Configure the following on first use:
- General settings – Expire listings, terms of use, upload image mandatory or not, form fields, header customization, tab taxonomy, quick actions.
- Approval settings – Manage admin users, inventory feature enable, post approval notifications with email template customize
- Meta data settings – Manage currency, category, country, city, state
Step 4: Test and Publish
- Click Publish in the top-right of the page to make it available to all users.
- Optionally add the page to the site’s top navigation and any hub navigation for easy discovery across your SharePoint environment.
5. Part 3 — Purchase the CV Classified Subscription
- To use CV Classified SPFX webpart without any interruptions, please purchase a CV Classified subscription from Microsoft Marketplace.
Step 1: Access CV Classified on Marketplace
- Go to Microsoft Marketplace
- Search “CV Classified” under SaaS Products or open the link below for direct access.
- https://marketplace.microsoft.com/en-us/product/codevisiontechnologiesprivatelimited1613132641660.cvclassified?tab=Overview
- Click on “Get it now”

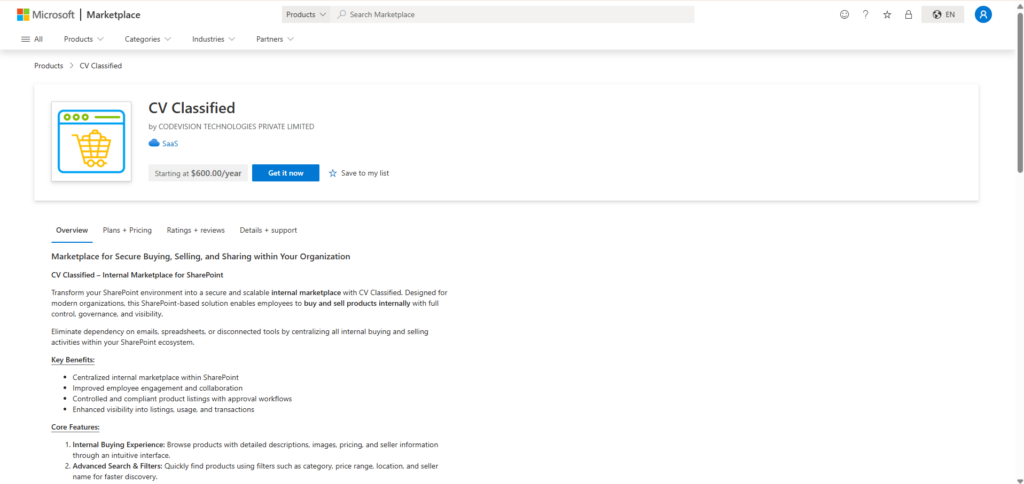
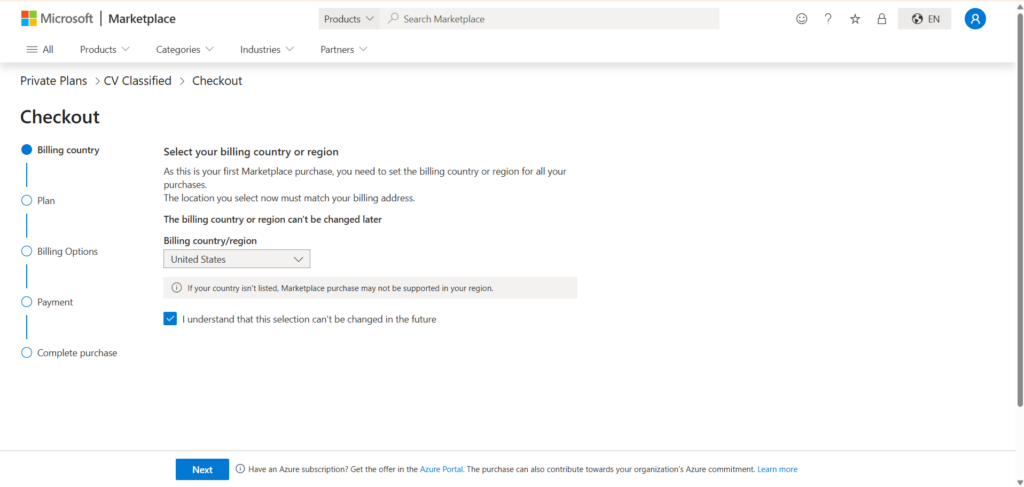
Step 2: Select Billing Country
- You will be redirected to the purchase page
- Select your Billing Country/Region from the dropdown
- Note: This cannot be changed later
- Accept the terms and click Next

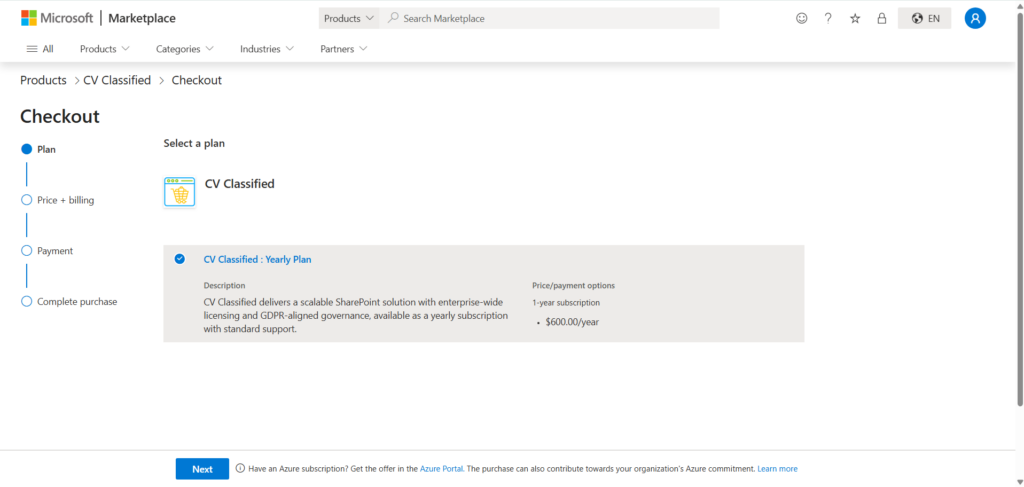
Step 3: Choose Subscription Plan
- Select your preferred plan:
- Yearly
- Click Next
Step 4: Review Pricing & Billing
- Verify pricing details and billing summary
- Click Next
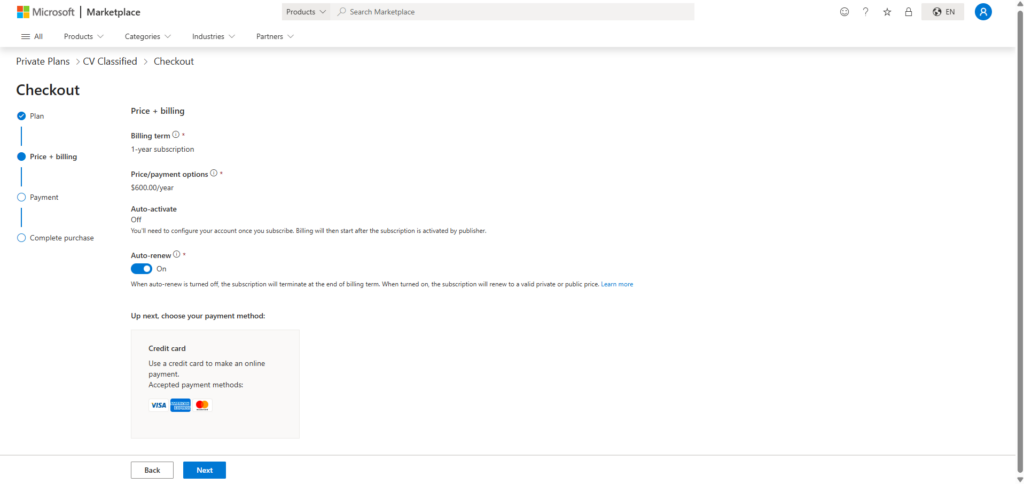
Step 5: Add Payment Details
- Enter payment information
- Click Save

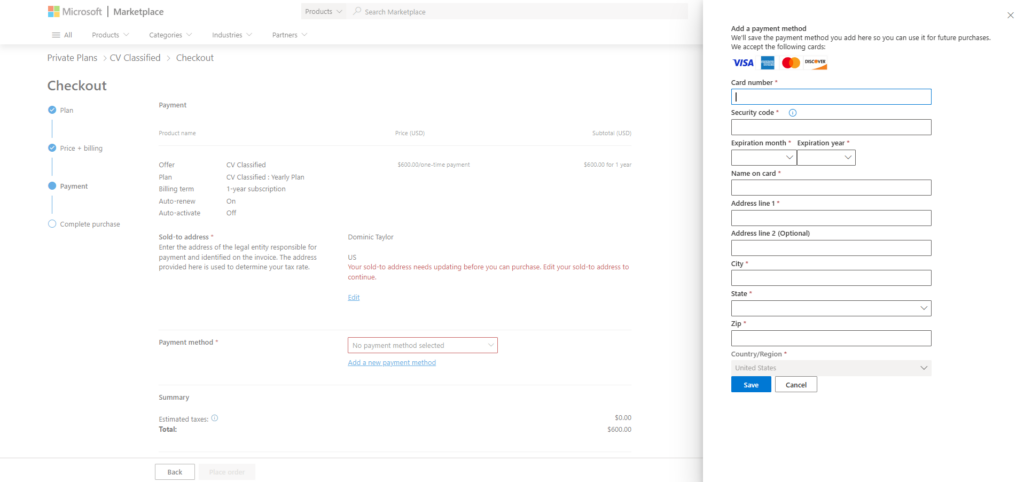
Step 6: Complete Purchase
- Click Place Order
- After successful payment, you will be redirect to our landing page to activate
your subscription. Once subscription activated you will be seeing a confirmation
message - You can now access full CV Classified features without any interruptions.
6. Part 4 — CV Classified Automate – Installation & Configuration Steps
- CV Classified Automate enables notification features such as renewal reminders, warning notices, expiry alerts, and scheduled email notifications using Microsoft Power Automate.
Step 1: Install Power Automate Solution
- Go to Power Automate- https://make.powerautomate.com
- Sign in with your Microsoft account
- Select the correct Environment (same as SharePoint)
- Navigate to Solutions from the left menu
- Click on Open Marketplace
- Search For CV Classified Automate or directly access from below link
- https://marketplace.microsoft.com/en-us/product/codevisiontechnologiesprivatelimited1613132641660.cvclassifiedautomate
- Click On Get It Now Button
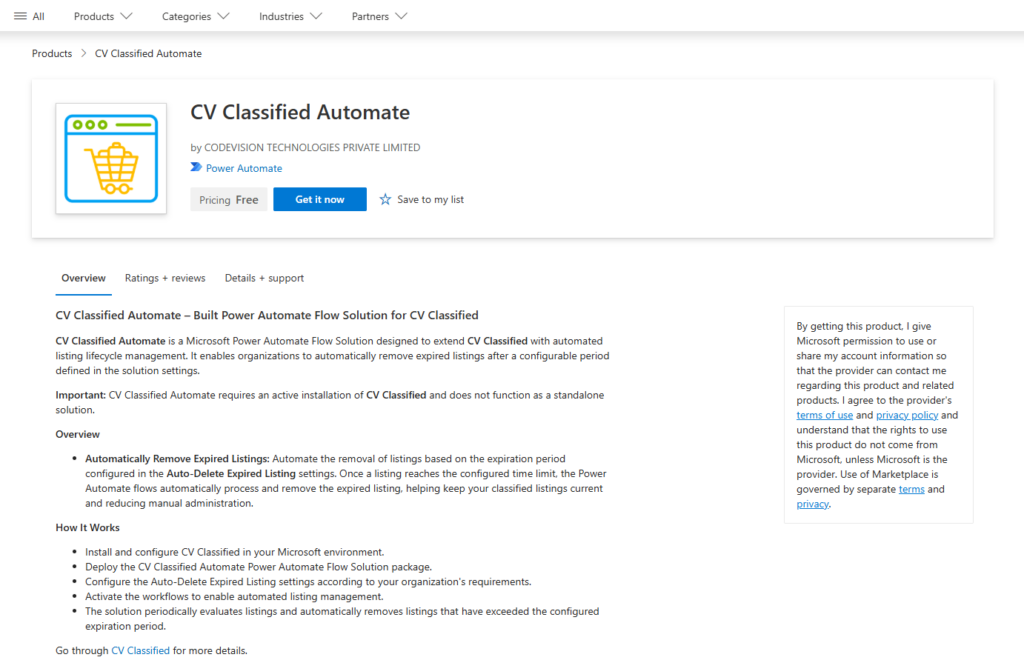
- Select an environment, check the box, and then click Install
Step 2: Set up Solution and Environment variable
- Open Power Automate or click on this link: https://make.powerautomate.com
- Select the same environment where you installed CV Classified Automate
- In Left menu Select Solution
- Find CV Classified
- Click on Update Environment variable
- Configure required connections
- Sign in and authorize all connections
- Set up the environment variables by selecting the appropriate values from the dropdown, then click Save and Close
Step 3: Fix Connections References
- On the left-hand navigation pane, select Solutions
- Stay on the All tab. open Default Solution
- In the left panel of the Default Solution, click on Objects > Connection references.
- Look for the connection references that belong to the Marketplace provider’s solution (you can identify them by their display name or publisher prefix).
- choose valid connection & select Edit.
- In the panel that slides open on the right, look at the Connection dropdown menu.
- If you already have an existing active connection for that service (e.g., Dataverse, Outlook, SharePoint), select it.
- If you don’t have one, click + New connection. A new browser tab will open for you to sign in and authenticate the credentials. Once authenticated, return to the solution tab, hit Refresh next to the dropdown, and select your new connection.
- Save Changes: Click Save at the bottom of the pane.
- Set up the environment variables by selecting the appropriate values from the dropdown, then click Save and Close
Step 4: Enable Flows
- Go to Cloud Flows inside the solution
- Open each flow
- Click Turn On
- Ensure all flows are enabled successfully
- Flow will be triggered on daily basis as per scheduled time
- Test the Notification feature
- Your system is now fully configured to receive all alerts and notifications
7. Part 5 — Upgrade the CV Classified SharePoint App
- Open the tenant or site-collection App Catalog where app installed
- Go to classic experience (skip this if already open classic experience)
- Search “CV Classified” & Select from grid
- Click on files from top header menu.
- Click Upgrade Store App options from App (If any upgrade version available it will enable)
- Wait for upgrading process.
- Once done deploy option will be visible. Review any pending additional API permission approval. (Refer step 2 from Part 1 — Deploy the CV Renew 365 SharePoint App )
- Click on deploy. It will redirect back to app catalog once process done
- Go to site page where webpart installed & check upgraded feature.
8. Support
- For technical assistance, license requests, or questions about pricing, contact Codevision Technologies Private Limited through one of the following channels:
- Email: support@thecodevision.com
- Web: https://thecodevision.com/
- Marketplace listing: search for “CV Classified” on Microsoft Marketplace and use the Contact Publisher link.