User Guide for CV Insight Loop
Admin Role for CV Insight Loop
1. Getting Started with CV Insight Loop:
Accessing the CV Insight Loop
- Open the CV Insight Loop on your device.
- Log in with your admin credentials.
2. Dashboard Overview
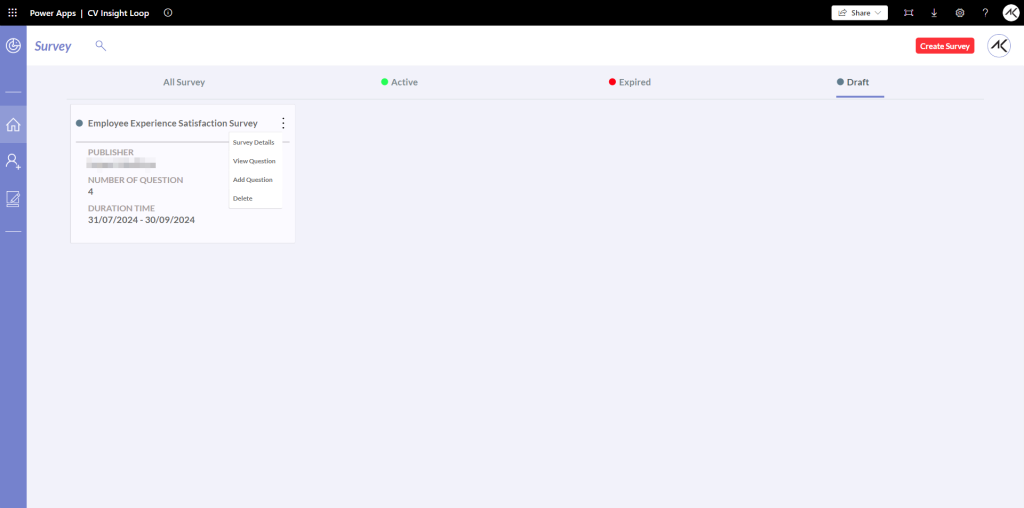
- On the main dashboard, you will see four toggle options:
- All Surveys: Shows all surveys available to you.
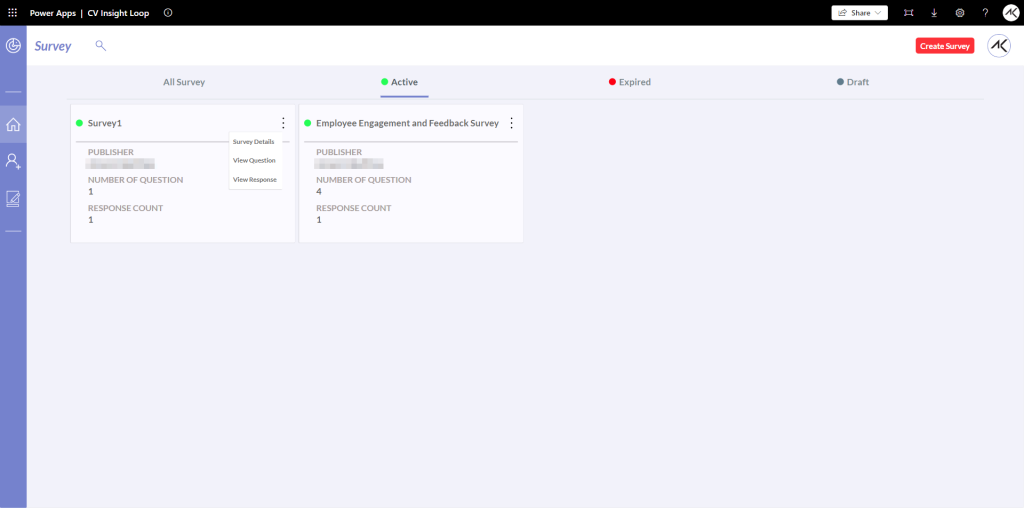
- Active (Green Color Dot): Displays surveys that are currently active and can be filled out. In this, admins can:
- View survey details.
- View questions
- View surveys response.
- Can only modify the End Date by clicking the edit icon, selecting a new date, and clicking “Save” button.
- Expired (Red Color Dot): Lists surveys that have expired and are no longer available for completion. In this, admins can:
- View survey details
- View questions
- View surveys response.
- Draft: Contains surveys that have been saved as drafts. You can add details and click on ‘Submit’ to activate these surveys. In this, admins can:
- View or edit each survey’s details.
- View or edit questions.
- Add new questions.
- Delete Survey
3. Steps for Add or Remove Admin
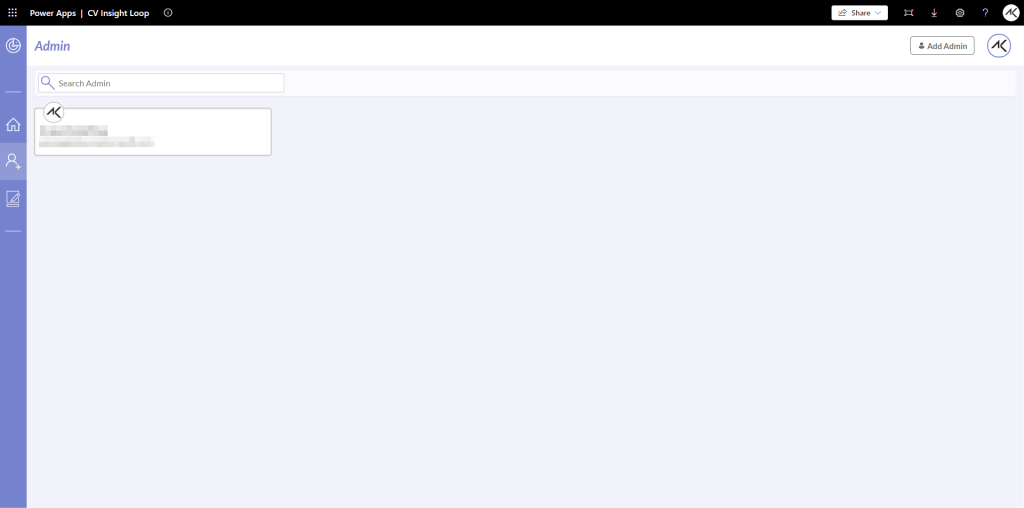
Navigate to Add Admin
- From the left side menu of the dashboard, click on the “Add Admin” icon.
Initiate Adding an Admin
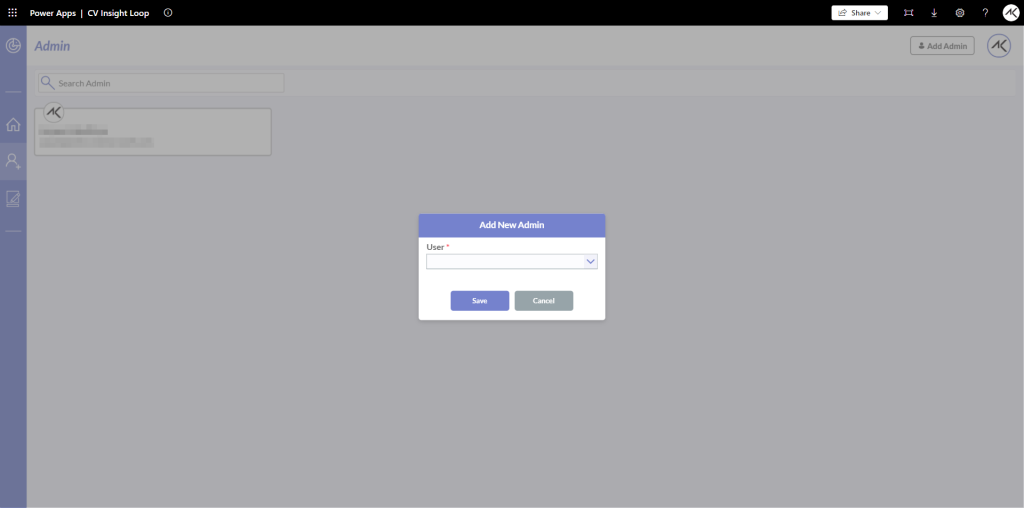
- Click on the “Add Admin” button at the top right corner of the page.
Select Admin from User List
- A popup will appear. Choose the admin you want to add from the user list provided.
Save the New Admin
- Click on the “Save” button.
4. Select the Admin to Remove
Navigate to Admin list
- Find the admin you want to remove from the list of current admins.
Remove the Admin
- Click on the “Remove” button next to the admin’s name.
Confirm Removal
- A confirmation popup will appear. Confirm the removal by clicking on the “Confirm” button.
5. Steps to Create a Survey
Navigate to Create Survey
- Click on the “Create Survey” button at the top right corner of the dashboard.
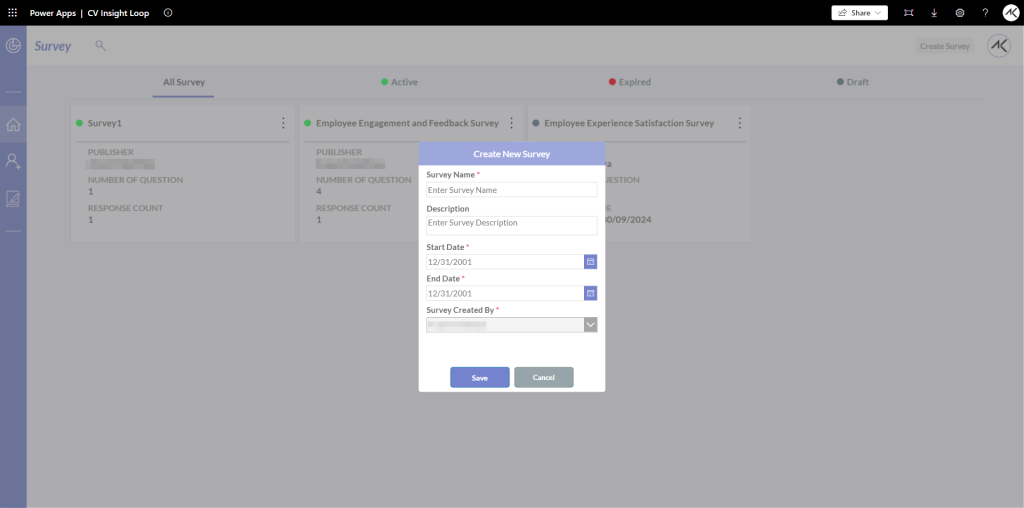
Fill in Survey Details
- Survey Name: Enter the name of the survey.
- Description: Provide a brief description of the survey.
- Start Date: Select the start date for the survey.
- End Date: Select the end date for the survey.
- Created By: The system will automatically display the name of the admin currently logged in as the survey’s creator.
Save the Survey
- Once all the details are filled in, click the “Save” button to create the survey.
- When the survey is created, and you have left behind it will saved as Draft.
6. Steps to Add Questions to a Survey
- After successfully creating a survey, you will be redirected to the next screen to add questions.
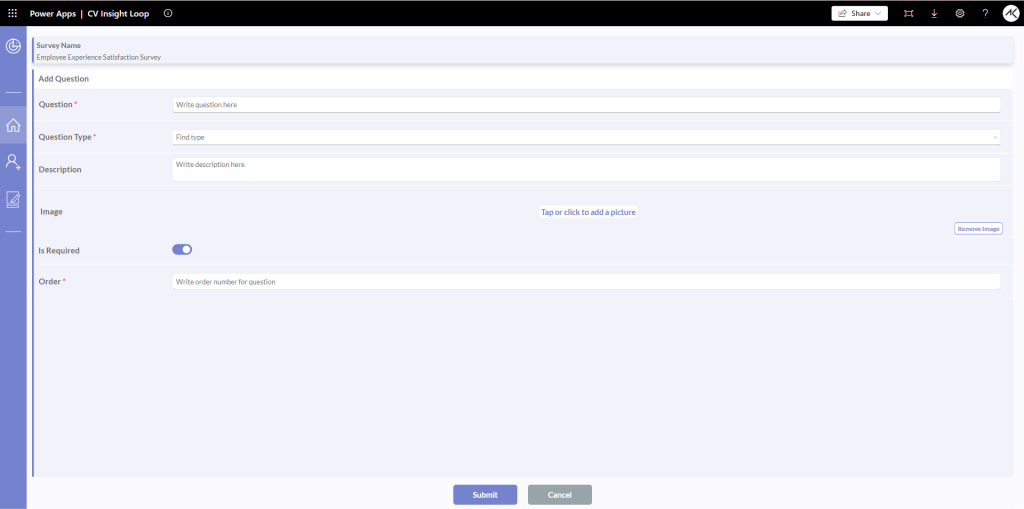
Fill in Question Details
- Question: Enter the text of the question you want to add.
- Question Type: Choose the type of question from the dropdown menu (e.g., Multiple Choice, Text, Rating, etc.).
- Description: Provide a brief description or additional information for the question.
- Upload Image: If necessary, upload an image related to the question by clicking on the “Upload Image” button.
- Order: Specify the order number for the question to determine its sequence in the survey.
- Place Holder: Enter placeholder text that will appear in the answer field.
Submit the Question
- After filling in all the required details, click on the “Submit” button to add the question to the survey.
Repeat for Additional Questions
- If you have more questions to add, repeat the above steps for each question.
Submit the Questions
- Once all questions are added click on the “Submit” button to complete the survey setup.
Confirmation Popup
- A confirmation popup will appear. Once confirmed, the survey will become active and available for respondents.
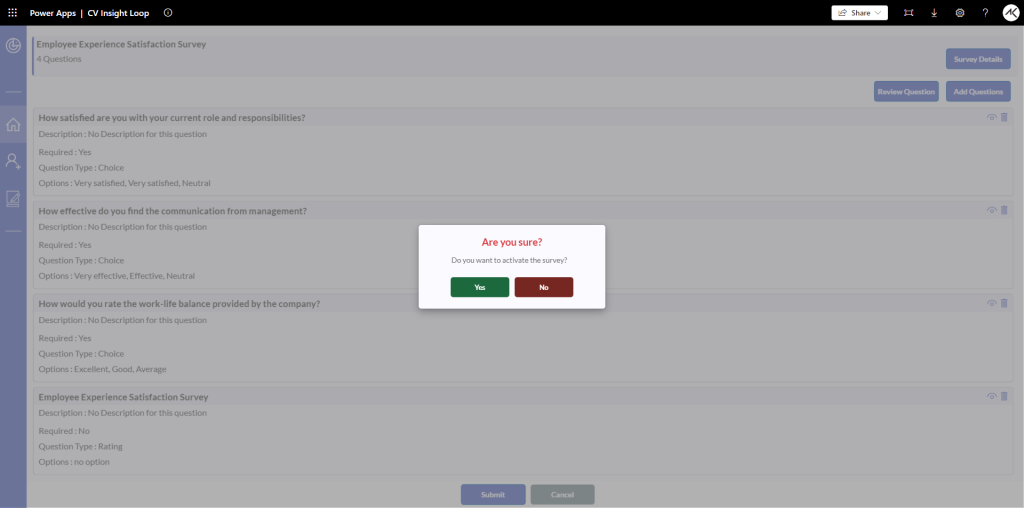
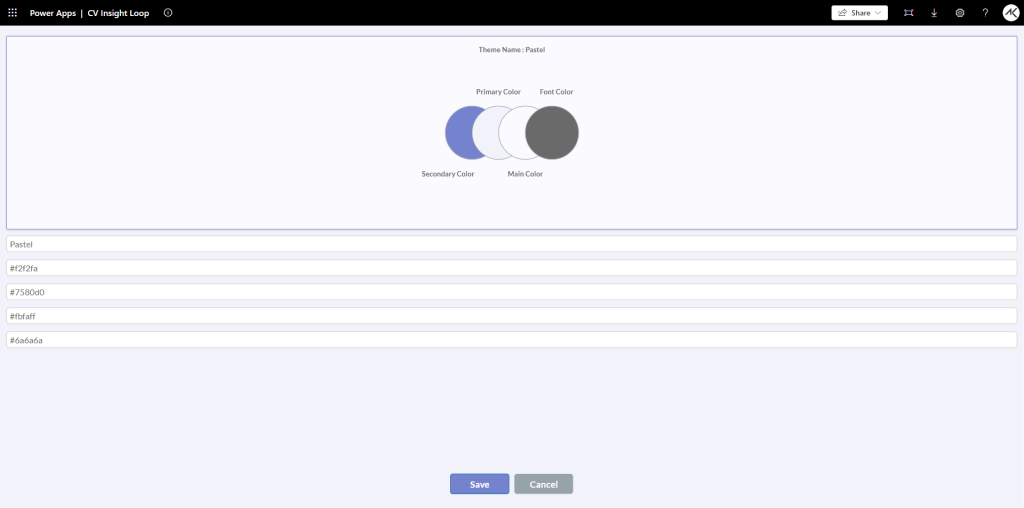
7. Steps to Customize Theme
Navigate to Modify Theme
- From the left-side menu of the dashboard, click on the “Modify Theme” icon.
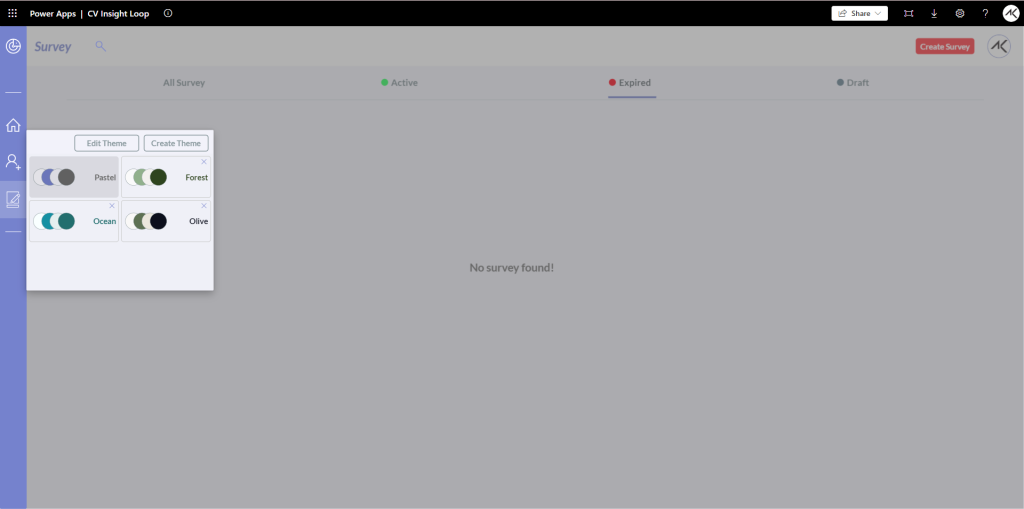
Apply a Theme
- Click on any existing theme to apply it directly.
Modify or Create a New Theme
- Modify Existing Theme: Select an existing theme and add the color codes make changes as needed, click on “Save” button.
- Create New Theme: Enter up to 4 color codes for the new theme and provide a name for it, click on “Save” button.
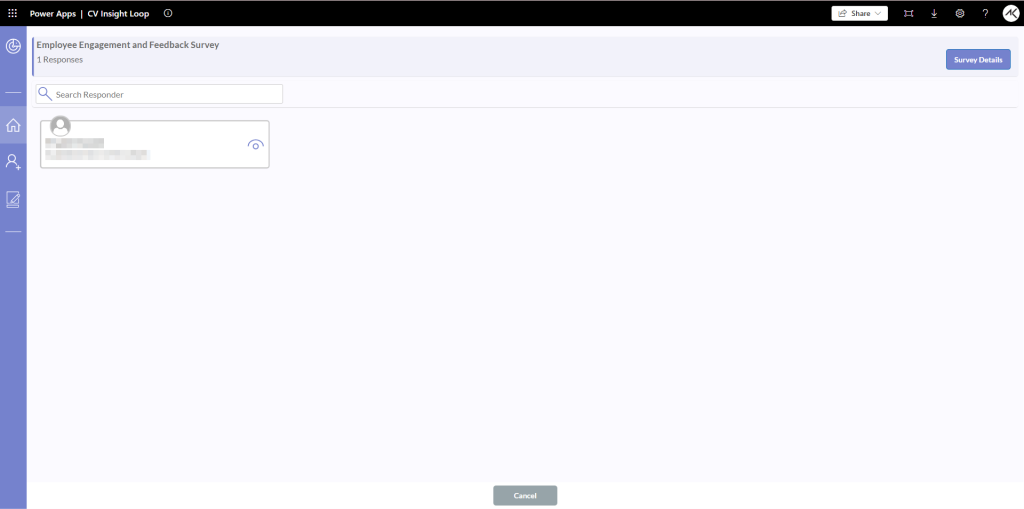
8. View Survey Responses:
- Clicking on this option will allow the admin to view the responses to the survey.
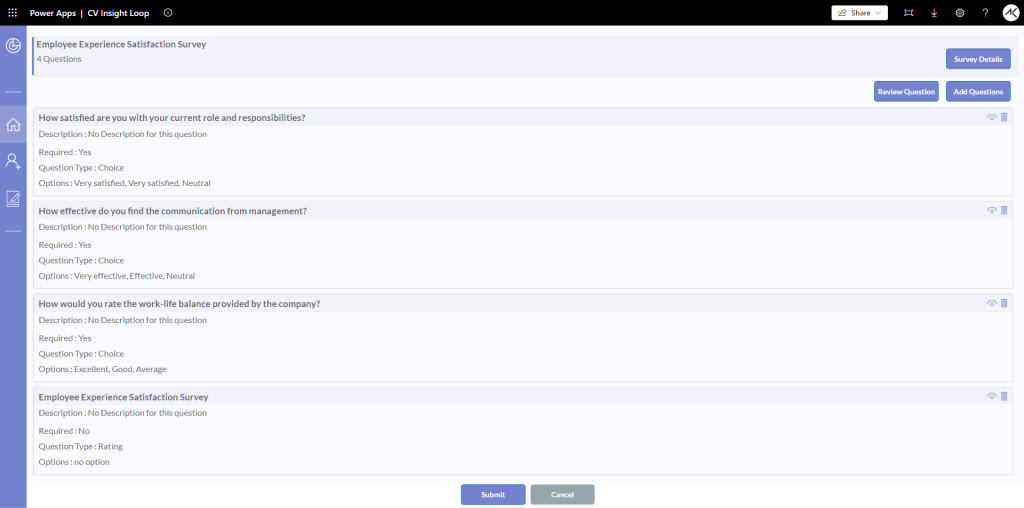
9. View Questions:
- Clicking this option will let the admin view the survey questions
Steps for User Role in CV Insight Loop
Admin or Users can easily search for surveys by clicking on the search icon at the top of the screen.
1. Accessing the CV Insight Loop
- Open the CV Insight Loop on your device.
- Log in with your credentials.
2. Main Dashboard
- On the main dashboard, you will see three toggle options:
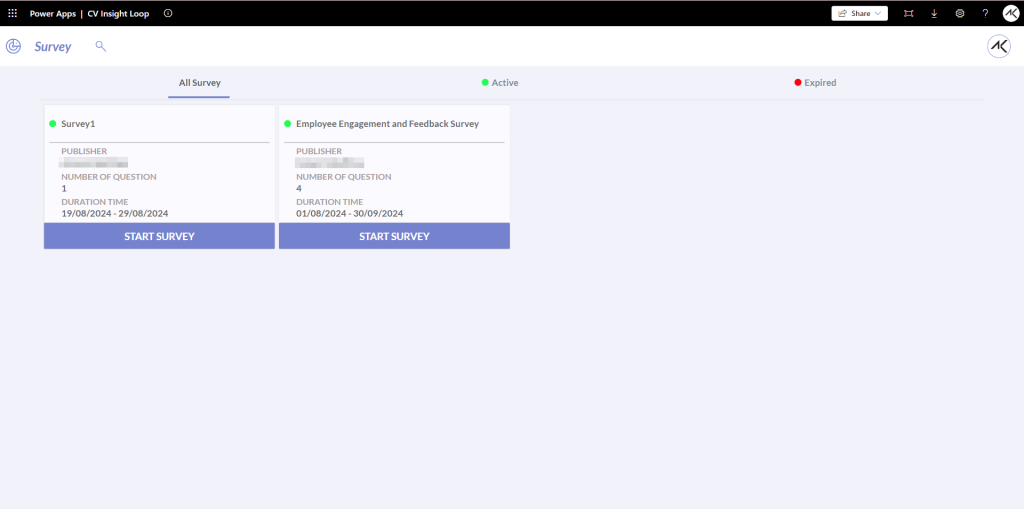
- All Surveys: Shows all surveys available to you.
- Active (Green Color Dot): Displays surveys that are currently active and can be filled out.
- Expired (Red Color Dot): Lists surveys that have expired and are no longer available for completion.
4. Navigating to Survey Options
- Below the toggle options, you’ll find three buttons with titles:
Start Survey:
- Click on the “Start Survey” button to view surveys you have not yet started.
- Select a survey from the list to begin filling it out.
- Here user get two options:
- Save as Draft: Click the “Save as Draft” button if you want to save your progress and continue later.
- Submit: Click the “Submit” button when you have completed the survey.
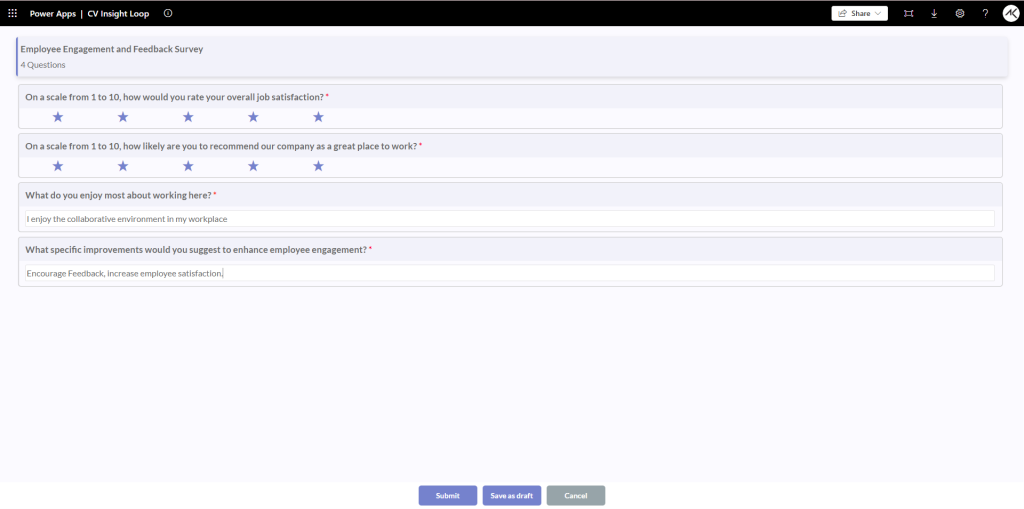
Continue Survey:
- Click on the “Continue Survey” button to view surveys that you have started but not yet completed (saved as draft).
- Select the survey you want to continue to fill.
- Complete the remaining sections of the survey and click on “Submit” button.
View Survey
- Click on the “View Survey” button to view details of surveys you have already filled out.
- You will see a summary of your previous responses.
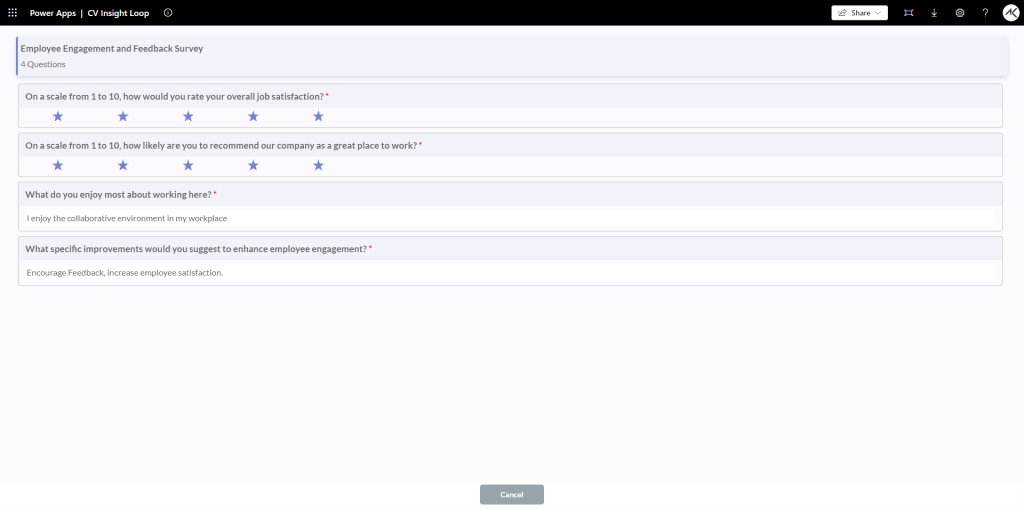
Note: Responses can be viewed – only and cannot be modified once submitted.
Need help with our solutions? Reach us at: support@thecodevision.com.
Explore CV Insight Loop & other applications developed by Codevision Technologies from the links provided below:
- Get CV Insight Loop: Click here to access CV Insight Loop
- Explore Our Suite of Applications: View all our apps


